Before you begin
As a medical practice grows or hardware ages the need for new computers to be added to the network will arise. When you first started using the Genie software you would have had somebody perform the installation for you so the idea of configuring a new machine can be quite daunting but it doesn't need to be!
This article will assist practices with installing Genie Client on a new computer. However please note that this information cannot be used when moving the Genie Server application to a new server computer or when going from a single-user to a networked practice environment. If you require assistance with either of the latter two scenarios, please contact Genie Support.
If you're planning to purchase any new workstations or new hardware in general, you should consult the Genie Hardware Specifications before doing so to ensure the new hardware is suitable for Genie.
Installing Genie Client
Please refer to our Downloads article to download the installer file for the appropriate version of Genie.
Once you've downloaded the correct installer file onto the new computer:
- Double-click the installer file to launch, accepting any prompts or alerts which appear.
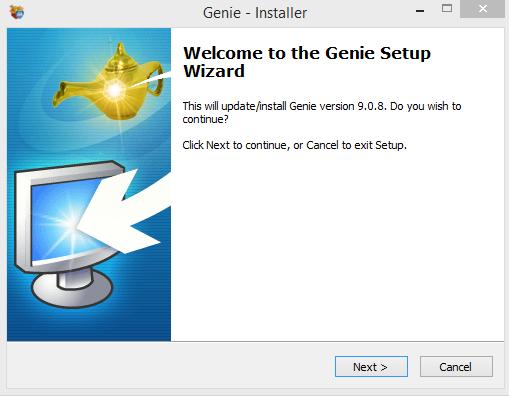
- When the installer window opens, click Next.
. 
- Accept the license agreement.
- Confirm you have read the information listed in the Information tab and select Next.
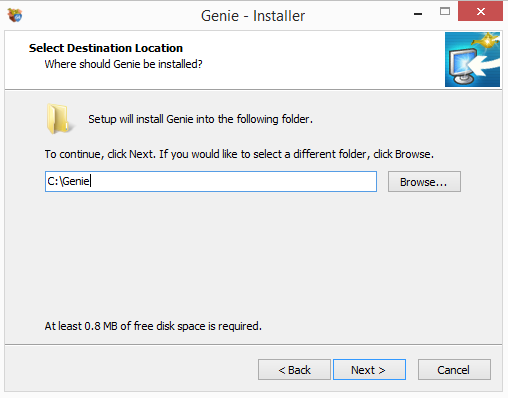
- Ensure the destination file path is C:\Genie (Windows) or Macintosh HD:Applications:Genie (Macintosh), then click Next.
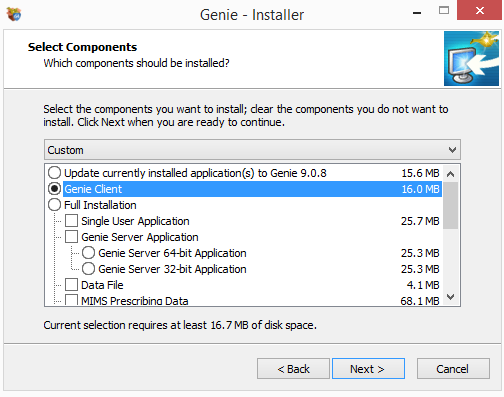
- At the Select Components to Install screen, select the Genie Client radio button and click Next.
- Click Install and allow the installation to run to completion.
- Upon completion, exit the installer window by clicking Finish.
Obtaining the server IP address
Before connecting your new Client application to the Genie Server, you will need to know your server IP address. If you do not know the server computer’s IP address, you can obtain it using one of the methods below.
- Access the server computer, go to Genie Server and select Window > Administration. The IP address is listed under the System Information heading on the left side of this window.
- Log in to Genie Client on an existing workstation computer. Browse to Help > About Genie (Win) or Genie Client > About Genie Client (Mac). You will find the Server IP Address listed in this window.
Connecting Genie Client to Genie Server
When launching Genie Client for the first time on the new computer, it should automatically connect to the Genie Server. If this does not occur automatically however, you will need to use the Custom Connect window to direct the application to the Genie Server. To do so:
- Double-click the Genie Client icon, then immediately hold down the Alt key (Mac: Option key) on your keyboard. A Connection to 4D Server window will appear.
- Select the Custom tab.
- In the Database Name field, enter ‘Genie’.
- In the Network Address field, enter the IP address of your server computer (if you are unsure of the IP address, see the Server IP Address section below).
- Click OK to connect.
Additional installations
All operating systems
External Devices
Don't forget to install any required printers and/or scanners onto the computer. For further information about printers and scanners refer to the relevant articles.
Medicare Online / My Health Record
The HIC Online adapter is no longer required to be installed on each client machine as of Genie v9.4.6, as Genie now connects your practice with Medicare Web Services. You will, however, need to have HIC Online installed if you access the My Health Record system using a NASH certificate. Please see our Setting up HIC Online article for steps on how to install this if required.
Offsite Logging
If you plan to use a laptop for offsite logging, Genie Solo must also be installed. Rerun the installer as per the ‘Genie Client Installation’ instructions, however, rather than electing to install ‘Genie Client’, expand out the Full Installation option and tick only Single User Application and Data File. Click Next and complete the installation.
Miscellaneous Folders/Files
You may have saved files to your Patient Handouts, Drawing Templates, or Queries folder that you would like to access from this new computer. Ensure that you have copied these from the Genie folder on a current machine into the Genie folder on the new computer. If you have spent time building up the Genie dictionary file you may want to copy this into the Genie folder as well.
Windows
For sites using Genie v9.2.2 and above, it is not necessary to install Ghostscript and Quicktime on Genie Client computers.
Ghostscript
PDFs can be viewed on Windows machines with the aid of a freeware program called GPL Ghostscript. To install Ghostscript:
- Download and run the gs918w32.exe installer found on the Ghostscript website following this link.
- Complete the installation, leaving the destination folder as the default.
- Open Genie and navigate to Special > ImagePro Control, then click the Where is Ghostscript button at the bottom of the window.
- Navigate to C:\Program Files\gs\gs9.xx\bin\ and open the gsdll32.dll file ('xx' is the Ghostscript version).
- Quit and restart Genie.
Quicktime
QuickTime, specifically a plug-in called QPix, is used by Genie to display and attach images, and to display some graphical components.
For Windows 7 and 8 we recommend QuickTime 7.7.3; for Windows 10 we recommend QuickTime 7.7.9.
PDF Printer
We recommend installing a PDF printer, especially if you intend to go paperless where possible.
Microsoft Print to PDF should automatically be installed on your Windows 10 machine. Otherwise, you can download a free PDF printer directly from the internet such as Foxit Reader or Cute PDF.
XPS Viewer
If Genie produces an error, or even crashes, when trying to Print Preview on your new Genie Client, then you may need to re-enable or reinstall XPS Viewer. You can re-enable the XPS feature within your Windows OS settings by navigating to Start > Apps and Features > Manage Optional Features > Add a Feature. In the list provided, scroll to XPS Viewer and choose to install. Allow the install to complete.
Once the install has finished you will see this in the list of ‘Optional Features’. A restart of Genie will then be required.
If you can see XPS Viewer installed but are getting a message in the print dialogue box that XPS Viewer is not installed, then it may be that the driver isn't listed in the Printers anymore. If this is the case, you may need to reinstall this driver. If you aren't sure how to do this yourself, your IT provider may be able to assist.
Macintosh
App Nap
If your Mac operating system version is OS X 10.9 (‘Mavericks’) or above, you will need to disable App Nap for all Genie applications. Browse to the Genie folder on this computer (Macintosh HD:Applications:Genie by default), right click on the Genie Client application and select Get Info. Tick the Prevent App Nap checkbox, close this window, and restart the computer.