Before you begin
If you are wanting to send your referral reply letters electronically then you will first need to ensure you are set up for Third Party Correspondence and that your addressee has been configured correctly. If you use a transcription company for your letters, please see our Importing Transcribed Letters article.
Referral/Reply Letters
Referral/Reply letters are typically used for correspondence between medical professionals. They're usually letters written regarding a patient to a provider in the Address Book, typically a referral to a specialist or a reply letter back to a referring doctor. They can be accessed from the below locations:
- The Appointment Book
- The Patient list
- A patient's Clinical window
- An Address Book record
Writing a new letter
- Highlight the patient (if applicable) and click on the
 red quill icon . The default letter will open, addressed to the referring doctor. If no referral has been entered in the patient Demographics, an Address Book search window will prompt you to choose an addressee. Clicking cancel to this window will allow you to create a blank letter or to add an address.
 - Choose the correct template from the Template drop-down menu.
- Click on the drop-down arrow next to the From field and select the doctor writing/dictating the letter.
- To address the letter to a different provider, click the
 Re-address button to search for another doctor in your Address Book. Enter the first three letters of the doctor’s Surname and/or First Name and click OK. Find and select the relevant doctor in the list.
 - To type your letter, click into the template and start typing.
Adding a CC
- To copy the letter to other providers, click the
 Add CC button .
 - Select from the Usual GP, Referring Doctors, Patient, All Interested Parties or Other (search for a doctor not in the interested parties list). The CC details will be added to the bottom of the letter.
- To add to the interested parties list select Edit Interested Parties and click Add.
- To auto format the CCs for a window envelope, hold down the Ctrl/Cmd key when you add the CC .
- To add the CCs at a specific line of your letter, move your cursor to the desired position on your letter and hold down the Shift key when you add the CC. The CCs will be added to the location of your cursor except when adding the Patient as a CC – you'll need to manually cut and paste this into the desired position.
Exporting to Word
This feature was depreciated in the initial releases of Genie v10, however has returned in Genie 10.2.2!
Referral letters in Genie have the capacity to be exported into Microsoft Word, providing that you have Word installed on your computer. This feature is for those people who prefer to use Word’s Autotype and AutoCorrect functions. If you would like to use this function, it is recommended that you turn on the option to save letters reimported from Word as attachments in the Correspondence tab of your User Preferences (File > User Preferences).
To export to Word:
- Click on the
 at top of your Referral/Reply window in your icons palette.
 - The letter will then open in Microsoft Word.
- Type your letter as required.
To import the letter back into Genie:
- Once you have finished writing the letter in Word, save and close the Word document and return to Genie.
- You will notice that the Word icon is now coloured red. Click on the
 to import the Word document back into 4D Write with all formatting retained.
You must remember to close the Word document before attempting to import it back into Genie, otherwise it won’t work! If you are receiving an error -49, this is most likely the cause.
- If the import is successful, the Word document is automatically deleted from your hard disk.
Letters to be reviewed
If you would like your letters to go through a reviewing or drafting process, you can use the Reviewed tickbox. This is useful if you use a typist, dictation software, or would simply like to come back to reread your letters later.
If the Reviewed tickbox is unchecked, the letter will be held in the To be Reviewed section in Open > Outgoing Letters. Once the has been reviewed, you can tick the Reviewed checkbox to mark it as such. This will then move it to Reviewed But Unprinted.
For more information, please see our Reviewing Correspondence article.
Printing and Saving
- Click the Print button
 to print the letter.
 - Click the Save button
 to save the letter to the Clinical record.
Merged Letters
Merged Letters differ from Referral/Reply letters in that they do not link a patient with a provider in the Address Book. They can be accessed from:
- The Appointment Book
- The Patient Demographics window
- The Clinical window
- The Patients List
- The Address Book
- The Account Holders window
Writing a New Letter
- Highlight the intended addressee and click the Merged Letter button
 .
. - Click on the letter template you wish to use and click Open. The title of the letter will display as the title of the window, i.e. Recall Letter.
- Click into the template and make the desired changes.
Clicking the save  icon to save the template will save the changes to the letter template itself. This does not save the letter to the patient's file.
Saving a Copy in Patient Notes
If you would like to save a copy of the letter in the relevant patient’s Clinical Window after printing, select the tickbox Save a Copy in Clinical Record.
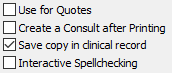
This would usually be done if the letter had medico-legal significance. In a year's time, you would still have an exact copy of what was mailed to the patient; the actual template may well have been modified, or even deleted during this time.
The copy of the letter is created when the letter is actually printed or emailed. If you were not actually printing the letter but still wanted to create a copy in the patient’s record, you can click on the Copy Without Printing button  to the right of the Print button.
Creating a Consultation Note
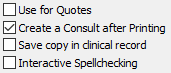
You can choose to have a consultation record created with a note like “<Template Name> sent 25/6/12” automatically inserted.
To do this, select the Create a Consult after Printing tickbox.
Printing and Saving
- Click the Print icon
 to print the letter. If you have ticked the Save a copy in the clinical record option, it will automatically save the letter and you can safely close it.
 - To save a copy to the patient’s clinical record without printing click the Copy to Patient Record icon
 .
.
Other tools
For more information on the other helpful letter writing tools at your deposal, please see the below links:
Viewing or editing saved letters
The process for viewing and opening Referral/Reply and Merged Letters is the same:
- Open the patient’s Clinical record. The letter will be in the Contacts List.
- Highlight the letter to display it in the preview pane. Note: do not make any changes in the preview pane as these changes will not be saved.
- Double-click on the letter to open the original in the letter writer. Ensure you save your changes before exiting the window.